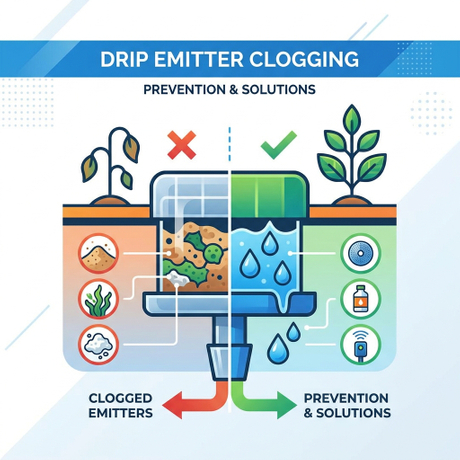
Size drip tubing from the field conditions, not from a universal diameter rule: collect run length, emitter spacing, emitter flow, zone flow, available pressure, elevation, water quality, filtration, pressure regulation, and maintenance access before comparing candidate tubing against supplier pressure-loss data.
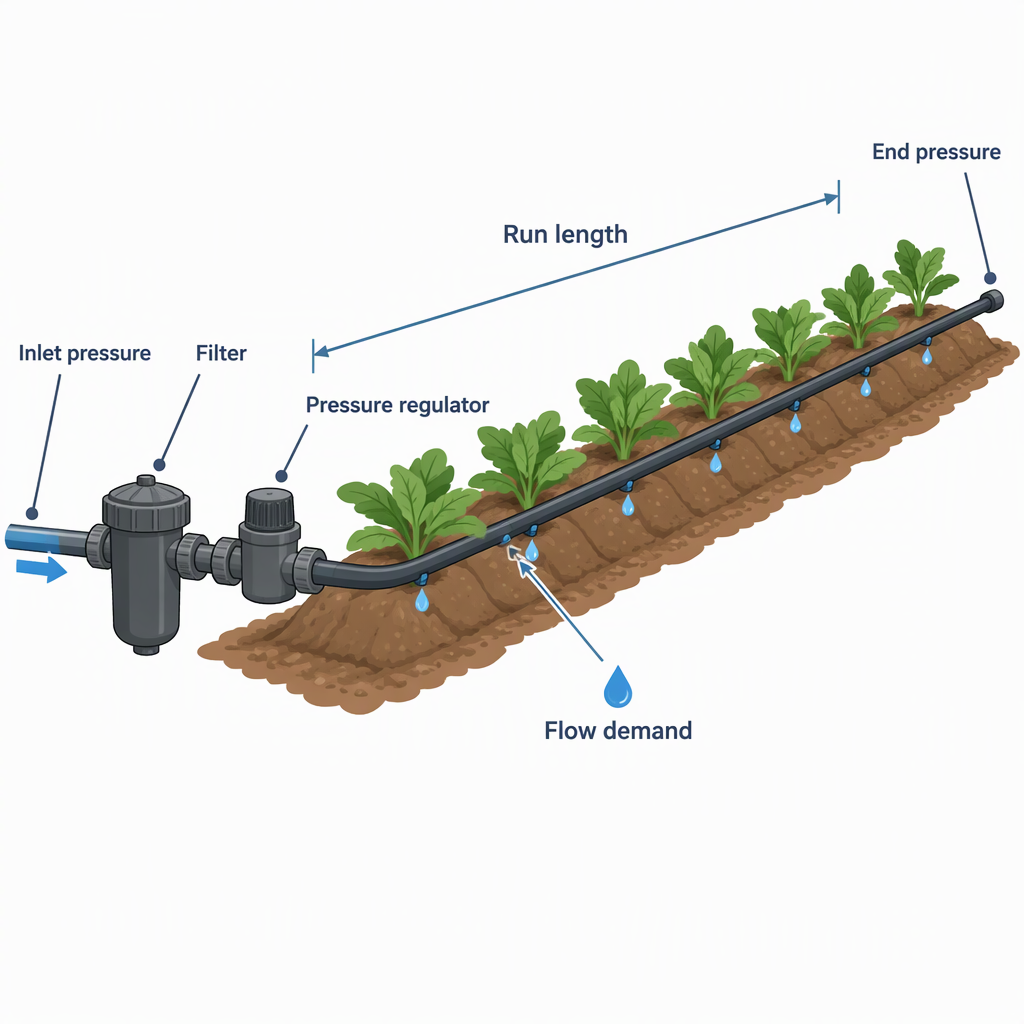
Start with the field inputs that control tubing size
The minimum input set for drip tubing diameter selection is the lateral run length, number of outlets, outlet flow, spacing, available inlet pressure, expected end pressure, water source condition, filter and regulator arrangement, soil wetting behavior, and maintenance access.
- Record the crop or planting layout, row length, lateral length, emitter or drip tape spacing, and the soil factors that influence wetting time; University of Maryland Extension notes that drip flow and wetting time vary with soil type, temperature, crop, and drip tape spacing in its drip irrigation guidance.
- Record the planned emitter flow and the number of emitters that will operate at the same time, because total flow is the quantity the tubing and supply line must carry.
- Confirm the intended component order at the zone inlet; common drip layouts place filtration ahead of pressure regulation so small outlets receive cleaner, controlled-pressure water.
- List water-quality risks such as suspended solids or biological material, because drip emitters, microsprayers, and drip tape require filtration and pressure regulation.
- Ask whether the product is drip tubing with emitters, microsprayers, or drip tape; pressure requirements differ, and excessive pressure can damage drip tubing and tape systems.
Calculate the flow the tubing must carry
Calculate flow by summing the outlets that operate on the same lateral or zone, then verify that the actual pipe flow can be measured under suitable field conditions.
- Start with one lateral: multiply the number of operating emitters by the nominal flow per emitter, or use the manufacturer’s rated flow per length for drip tape.
- For a zone, add the flow of all laterals that open together; this gives the demand that the valve, filter, regulator, mainline, submain, and lateral inlet must serve.
- Convert units before comparing data sheets. Keep length, pressure, and flow units consistent across supplier tables, field meters, and project drawings.
- If field flow is measured, choose a meter installation that allows accurate pipe-flow measurement; Utah State University Extension explains that flow rate relates to velocity and flow area, and that accurate pipe measurement depends on full pipe flow, velocity distribution, and suitable straight-pipe conditions in its irrigation flow measurement guidance.
Use calculated flow for screening and measured flow for confirmation. The calculation tells procurement which tubing charts to request; the field measurement shows whether the installed zone is actually receiving the expected water volume over time.
Use run length to screen pressure-loss risk
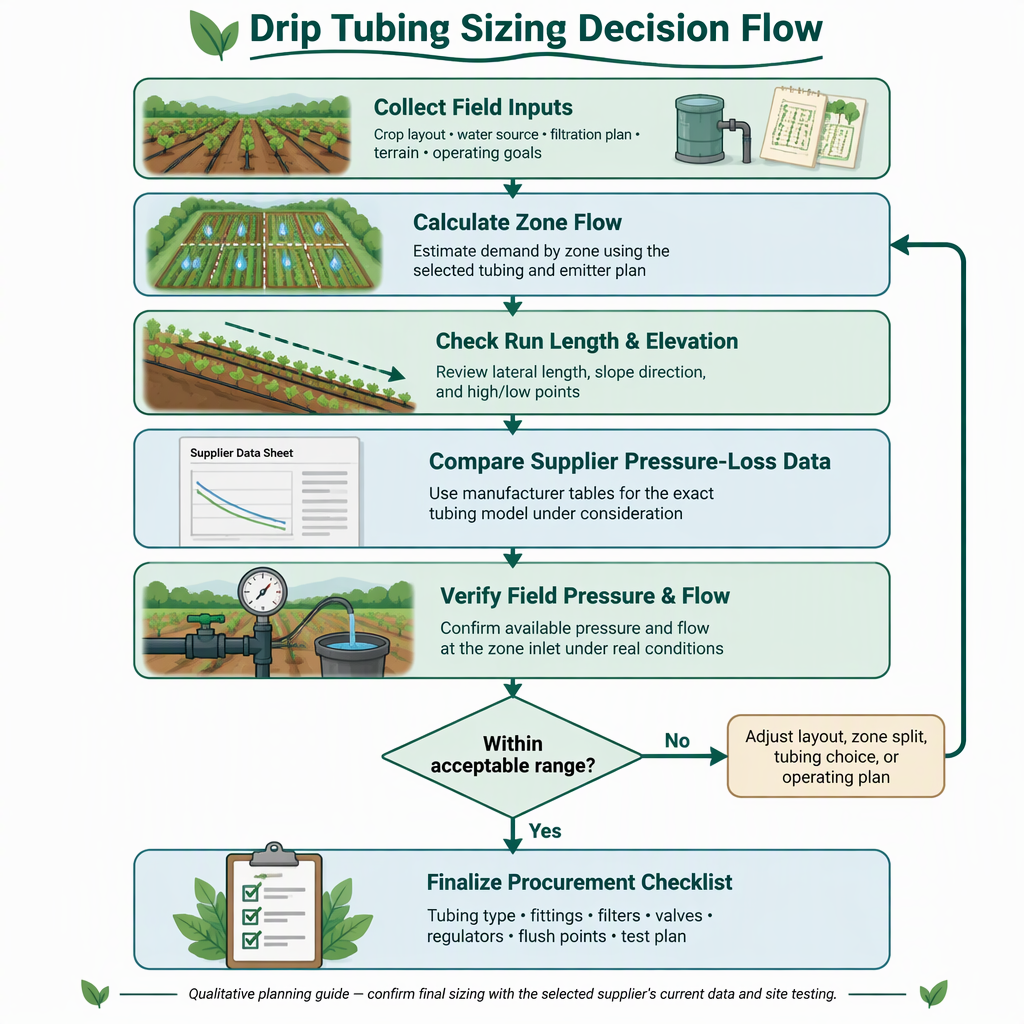
Longer drip runs and higher zone flow increase the need to check pressure loss, so diameter selection should move from layout inputs to supplier pressure-loss charts before an order is placed.
- Calculate the total flow entering the candidate lateral or drip tape section.
- Note the run length and spacing, because the wetting result depends on the system layout as well as soil and crop conditions.
- Check whether the candidate product is designed for the intended pressure range; drip tubing and drip tape can have different pressure needs.
- Compare each candidate diameter against the supplier’s pressure-loss data for the calculated flow and run length. Reject a diameter if the expected pressure at the far end would fall below the product’s required operating range or if inlet pressure would exceed the product’s limit.
Do not copy a maximum run length from a different emitter spacing, wall type, or pressure class. A hydraulically acceptable diameter on clean water may still be a poor selection if filtration, flushing, and pressure regulation are not matched to the actual water source.
Build the pressure window before choosing a diameter
The usable pressure-loss window is the difference between controlled inlet pressure and the minimum acceptable end pressure after allowing for filters, fittings, elevation, and the product’s own pressure requirement.
| Pressure item | How it affects the diameter decision | Buyer action |
|---|---|---|
| System operating pressure | Drip systems are low-pressure systems; University of Maryland Extension describes drip irrigation operating at about 8–10 psi. | Select tubing only after confirming the pressure range required by the chosen emitter or tape. |
| Pressure regulation | Clemson Cooperative Extension states that drip emitters, microsprayers, and drip tape require pressure regulation in its filters and pressure regulators factsheet. | Specify the regulator setting and confirm that downstream pressure remains suitable at the far end. |
| Overpressure risk | Drip tubing and drip tape can be damaged by excess pressure. | Do not solve pressure loss by simply raising pressure unless the product and fittings allow it. |
| Measured flow condition | Flow readings are only useful when the measurement setup supports accurate pipe-flow measurement. | Use suitable meter conditions before accepting a field reading as the basis for a repeat order. |
Account for filtration, water quality, and maintenance
Filtration and maintenance are sizing constraints because clogged emitters or unstable pressure can make a correctly calculated diameter perform poorly in the field.
- Specify the filtration requirement for the selected emitter or drip tape; Clemson Cooperative Extension gives 150 mesh filtration as an example for drip systems.
- Match the filter type to water quality rather than treating the filter as an accessory after the tubing is selected.
- Place filtration and pressure regulation in the inlet design so the lateral receives cleaner water at controlled pressure.
- Before opening a filter housing, flushing assembly, pump area, or powered control equipment for manual access, switch off and disconnect the relevant power source, isolate pressure, and follow the model manual’s permitted access procedure.
- Plan flushing points and inspection access before ordering long runs, because debris management affects reliability over the life of the system.
If the water source changes seasonally, ask the supplier to confirm whether the filter mesh, flushing method, and regulator setting remain suitable. Pressure-loss calculations do not replace water-quality control.
Verify the selection with a field check or sample run
A field check should compare expected flow and pressure with measured inlet pressure, far-end pressure, and zone flow under the same operating condition.
- Install a short representative run or test an existing block with the same spacing, water source, filter, regulator, and crop layout expected for the project.
- Measure flow only under suitable pipe conditions; full pipe flow, velocity distribution, and straight-pipe installation conditions affect measurement accuracy.
- Record inlet pressure after regulation and pressure near the far end, then compare the result with the product’s allowable operating range.
- Run the system long enough to observe the wetting pattern that matters to the crop and soil, because wetting time depends on soil type, temperature, crop, and spacing.
- If measured flow is materially different from the calculated flow, resolve the cause before ordering more tubing; common checks include zone count, open valves, meter installation, and product rating units.
Turn the sizing work into a supplier checklist
Procurement should request enough hydraulic, pressure, filtration, and maintenance information to prove that the selected drip tubing fits the actual run length and zone flow.
- Calculated zone flow and lateral flow, with units and the number of operating outlets.
- Run length, emitter or outlet spacing, crop layout, soil condition, and expected irrigation duration.
- Tubing or tape pressure range, pressure-loss data for the candidate diameter, and warning limits for excess pressure.
- Required filtration level, compatible filter type, flushing method, and regulator setting.
- Fitting compatibility, connection method, and whether the same fittings are used for test samples and the final order.
- A sample-run plan that defines where flow and pressure will be measured before volume purchasing.
Conclusion
The right drip tubing diameter is the one that carries the calculated flow across the required run length while staying inside the product’s pressure range and allowing effective filtration, regulation, flushing, and field verification.
- Start with flow demand, not nominal tubing size.
- Treat filtration and pressure regulation as part of the sizing decision.
- Use soil, crop, spacing, and wetting time to confirm that the hydraulic choice also fits the field application.
FAQs about drip tubing diameter selection
These questions help dealers, project engineers, and procurement teams turn drip tubing diameter selection into a repeatable project check.
What is the best drip tubing diameter for every farm?
There is no evidence-based universal diameter for every farm. Choose diameter from run length, total flow, pressure range, spacing, soil wetting behavior, water quality, and the supplier’s pressure-loss data.
Does a longer run always need a larger diameter?
Not always, but a longer run increases the need to check pressure loss against the product’s allowable operating range. A short low-flow lateral and a long high-flow lateral should not be screened with the same assumption.
Should I calculate lateral flow or zone flow first?
Calculate both. Lateral flow helps select the drip tubing, while total zone flow helps confirm whether the upstream valve, filter, regulator, and pipework can supply all operating laterals.
What pressure-loss limit should I use?
Use the chosen product’s operating pressure range and pressure-loss chart rather than a generic limit. Drip tubing and drip tape can have different pressure needs, and excess pressure can damage the system.
Why does filter mesh affect tubing selection?
A filter that does not match the emitter or tape requirement can allow clogging, which changes the field result even if the hydraulic sizing looked acceptable on paper.
How can I confirm that installed flow is accurate?
Use a suitable flow meter setup and confirm that pipe-flow conditions support accurate measurement, including full pipe flow and appropriate straight-pipe conditions.
When should I request a sample run before purchasing?
Request a sample run when the project has long laterals, unfamiliar water quality, new emitter spacing, or soil conditions that make wetting time uncertain.